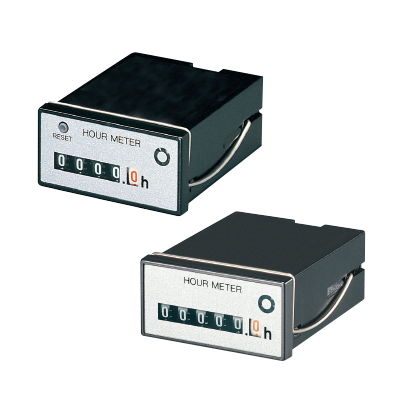
Discontinued Products
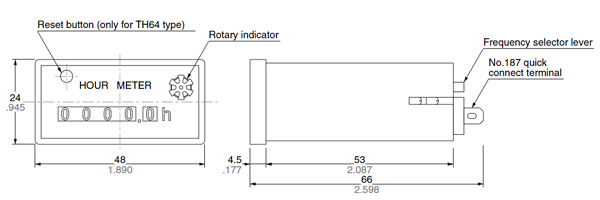
Dimensions
- Unit: mm in
General tolerance: ±0.5 ±.020
Panel cutout dimensions
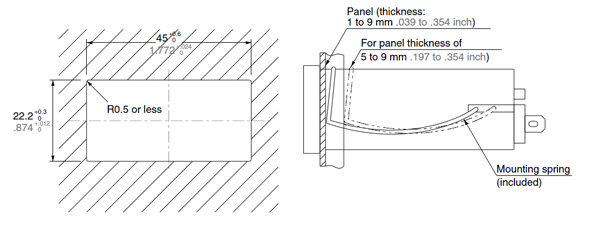
Mounting
- Cut a 22.2 +0.3/0 x 45 +0.6/0 mm (.874 +.012/0 x 1.772 +.024/0 inch) opening in the panel.
- Swing the mounting spring to the rear of the hour meter and fit the hour meter into the panel opening. (There is no need to detach the mounting spring from the hour meter.) If the panel is 5 to 9 mm .197 to .354 inch thick, move the mounting spring to the other hole toward the rear of the hour meter.
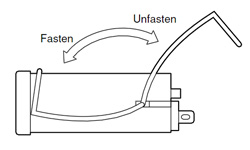
- Swing the mounting spring to the front of the hour meter to secure the hour meter to the panel.
- Wire the supplied quick connectors and connect to the hour meter. Be sure to use the supplied insulating sleeves to cover the connectors.
Frequency setting
Frequency is specified for AC motor-driven hour meters. Before installing, be sure to check your local power frequency.
Connections
・TH13, 23, 14, 24, 40, 50, 63, 64
|
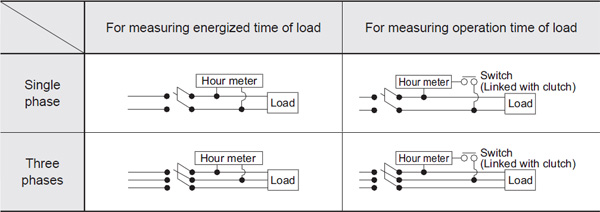
Note : Make the connection with the accompanying flat connector first and then with the hour meter's terminal (#187). In such case, be sure to cover the connection with the accompanying insulating sleeve.
・TH70, TH8
|

Note : Solder the lead wires in position.
Reset-type hour meter
Precautions for use
If the number indications are off before use, press reset button and confirm that all zeroes "0" are displayed.
Resetting caution
Exercise due caution as an insufficient amount of pressure on reset button may result in abnormal readings.